

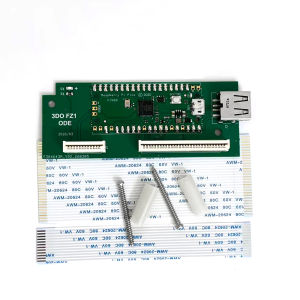
3DO FZ1 ODE Optical Drive Emulator USB MOD Includes Screws And Cable Simple Installation Multi Disc Game Support NVRAM Backup
Must Read Before BuyingThis item is an ODE for the FZ-1 console and cannot be used with the FZ-10 console.You must have a reasonable level of technical ability and follow the installation guide.The FZ1 ODE has been updated with the latest firmware and tested prior to shipment. Please do not attempt to erase or re-flash the firmware yourself.FZ1 ODE DescriptionThe FZ1 Optical Drive Emulator (ODE) allows users to continue playing their FZ1 consoles even after the optical drive has failed. Due to the nature of the components used in the FZ1 optical drive, it will eventually fail, rendering the console inoperable.Product Features:•Supports USB 2.0 flash drives and microSD cards; it is advisable to keep a few spare cards on hand in case of compatibility issues.•Supports FAT32 and exFAT file systems.•CUE/BIN images are more compatible than ISO images. We recommend CUE/BIN.•Support music CD images.•Supports NVRam backup and restoration.•Supports multi-disc games.•The PCB is smaller, making it easier to install.Operation StepsImportant! Before removing the console, installing or operating the ODE, you must unplug the console from the wall socket.Failure to exercise due care and precision during these operations may result in permanent damage to the console or the ODE. By proceeding, you acknowledge that you undertake all such actions at your own risk and liability, and that you will not hold us liable for any such damage.Operation Steps:1.Unscrew 4 phillips head screws from the bottom of the console.2.Remove the top cover.3.Unscrew the screws holding the CDRom drive4.Carefully remove the ribbon cables from the CDRom drive.5.Take CDRom apart to remove the surrounding bracket.6.Mount ODE to the CDRom bracket7.Connect the ODE to the ribbon cables, making sure that blue stripes are facing down.8.Mount the bracket to the consolePlace the boot.iso file in the root directory of the storage medium.Menu OperationLayout overview:•Left pane is a quick guide to the buttons.•Right pane is the file browser or menu selector.•Blue cursor indicates the file browser.The names in [square brackets] indicate directories.•Special directory [..] indicate return to the parent directory or refresh if root.•Green cursor indicates the "X" menu.Menu is controlled using joypad as following :•Up : cursor up.•Down: cursor down.•Left shoulder : previous page•Right shoulder :next page•A: enter the directory or add the file to the play queue for multiple disc operations•B: clear queue•C: fast start of current file•P: Play queue•X: Toggle the "X" menu. Green cursor indicated the "X" menu.Important:•Eject: 1 press changes the disc to the next one in the play queue or back to first. If only onedisc is in the queue (fast start), the game will simply reset, equivalent to ejecting the disc andinserting it back in.•Double press changes the disc to "boot.iso" and clears the queue, allowing you to return to themenu.Adding the the games to the queue :Select the game file using up/down. Press A. The file will be highlighted yellow, and the queuecount on the left pane will increase. There are a maximum of 5 entries to the queue. You can clear the queue by pressing B.Pressing X toggles the "X" menu. This is indicated by the green cursor.Selection of the items is done by pressing the "A" button.Storage Manager opens the NVRam file manager:To exit the storage manager, press"X"Saving and loading the NVRam:Assuming you're in the desired location, Press "X" to open the X menu.Navigate to "Save NVRam to current dir" option. And press "A"The current NVRam content will be saved to the current directory. The progress will be indicatedby the following screen. Please avoid powering off the console at this moment, as it may corrupt files on your microSD or USB disks.After exiting the X menu by pressing the "X" button, you can observe the newly created backupof the nvram:F&QQ: Why isn’t the USB flash drive working?A: You’ll need to have a few spare USB flash drives to hand for testing, as not all of them are compatible with the device.Q: The ODE emulator cannot start, what should I do?A: First, check if the boot.iso file is placed in the root directory of the storage medium. If it is not placed or the file is damaged, re-download the boot.iso file and place it correctly; second, check if the ribbon cable connection is correct (blue stripes facing down), if the connection is wrong, reconnect the ribbon cable; finally, check if the storage device is compatible, and replace it with a spare storage device for testing.Q: The game cannot load normally and prompts a file error, what should I do?A: Check if the game image file format is CUE/BIN or ISO, and prefer CUE/BIN format; check if the file is complete, if the file is damaged, re-download the game image; check if the storage device has enough space to ensure the device reads normally.Q: NVRam backup fails or cannot be restored, what should I do?A: Check if the storage device has write permission and ensure the storage device has sufficient space; check if the NVRam file is complete, if the file is damaged, back up again; if the problem still cannot be solved, visit the project website for technical support or contact customer service.Q: Cannot switch discs for multi-disc games, what should I do?A: Check if multiple game files have been added to the play queue (maximum 5). If not added, press A to add the game files to the queue; check if the Eject key operation is correct, press once to switch to the next disc, double press to return to the main menu; if the queue is empty, re-add the game files.

Global Merch Park
Review
You May Also Like

KUMENG | Portable Mini USB-Cooling Fan for Students and Outdoor Use
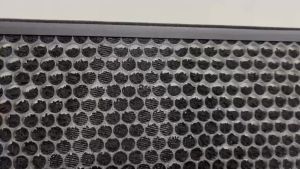
fit Panasonic F-ZXHP55Z F-ZXHD55Z Air Purifier Filter HEPA + Deodorizing for F-PXH55A / F-VXH50AFast shipping
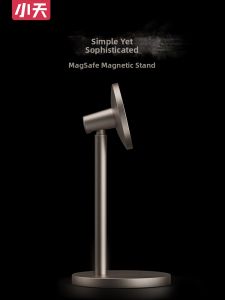
xiaotian | Magnetic Multi-purpose Phone Desktop Stand Metal

SteelSeries QcK Cloth Gaming Mousepad
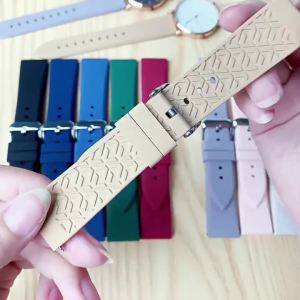
16/18/20/22mm Soft Quick Silicone Universal Watch Band for Samsung for Huawei for Xiaomi for Garmin Straps Belt Sports Band

3 Pairs Silicone Ear Caps For AirPods 4rd Ear Cover Tips Accessories Protective Case Skin Covers For Apple AirPod 4
NEXSTAND K7 Laptop Stand Folding Portable Laptop House Office Ergonomic Stand Notebook Stand Notebook Suporte Laptop Accessories2026
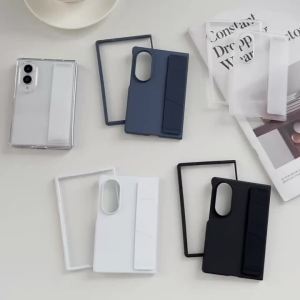
For Samsung Z Fold 8 7 6 5 4 3 Case Silicone Elastic Wrist Strap Ultra Thin Hard PC Matte Cover for Samsung Galaxy Z Fold 8Ultra

MeeGoo 4 in 1 USB C Cable 60W Fast Charging & Data USB A Type-C Charger Wire For Tablet phone Charging Cable
NNBILI 90Degree Elbow Micro USB 2.4A Fast Charging Data Cable Phone For Samsung Xiaomi Android Quicked Charger USB Cord 1m/2m/3m

UGREEN Cell Phone Stand Desk Liftable Adjustable Aluminum Mobile Tablet Holder Compatible for iPhone 15 14 13 12 Pro Max iPhone 11 X SE XS XR 8 Plus 6 7 6S Samsung Galaxy Note20 S22 S21 S9 S8 S7 Smartphone for 4.7-7.9 Inch Phone